
The Complete Robot Vacuum Maintenance Guide
Keep your robot vacuum running at peak performance — tips from the Euronics Specialists
Your Maintenance Schedule at a Glance
How often you need to maintain your robot vacuum depends on how frequently it runs, whether you have pets, and the type of flooring in your home. Here's a practical schedule based on daily use:
Pet Owners: Increase Your Frequency
If you have dogs or cats, you'll likely need to clean brushes and empty the bin more often. Pet hair tangles quickly around rollers and side brushes, putting extra strain on the motor. A quick weekly check can prevent bigger problems down the line.

1. Emptying and Cleaning the Dustbin
The dustbin is the most basic — and most important — part of robot vacuum maintenance. A full bin reduces suction power significantly and forces the motor to work harder, which shortens its lifespan over time.
Remove and Empty After Each Run
If your robot doesn't have a self-emptying dock, remove the dustbin after every cleaning session and tip the contents into your household bin. Even if it doesn't look full, fine dust can block airflow and reduce performance.
Rinse (If Washable)
Some dustbins are washable — check your manual. If so, give it a rinse under lukewarm water every couple of weeks to remove caked-on dust. Allow it to dry completely before reinserting — never put a damp bin back into the vacuum.
Check the Seal
Inspect the rubber seal around the dustbin opening. A worn or dirty seal can cause dust to leak back into the vacuum's internals. Wipe it clean and replace if it's cracked or degraded.
Self-Emptying Docks
If your robot has a self-emptying base station (like the Dreame L40 Ultra or Eufy X10 Pro Omni), the dock automatically empties the onboard bin into a larger dust bag. You'll still need to replace the dock's dust bag every 30–75 days depending on usage. Don't forget to check and clean the dock's filter periodically as well.

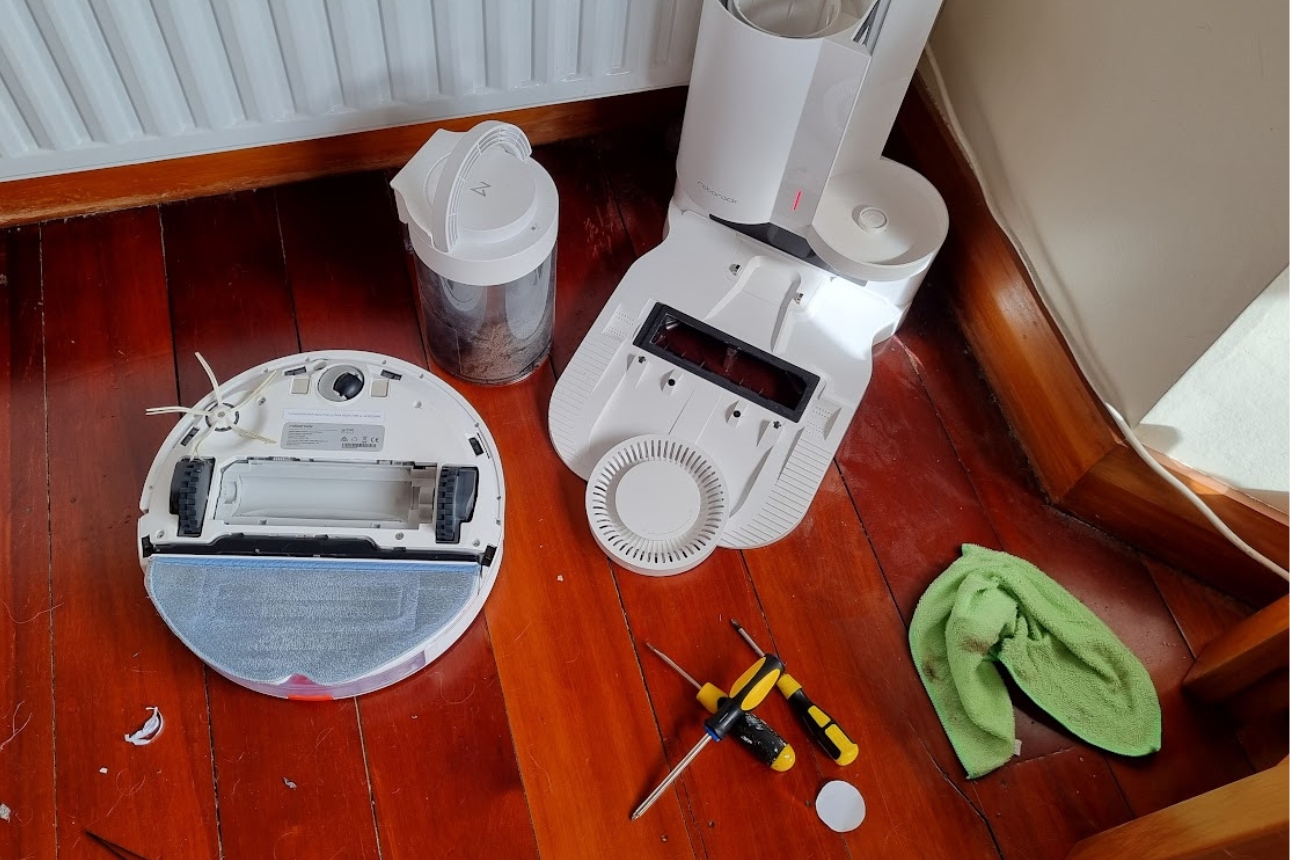
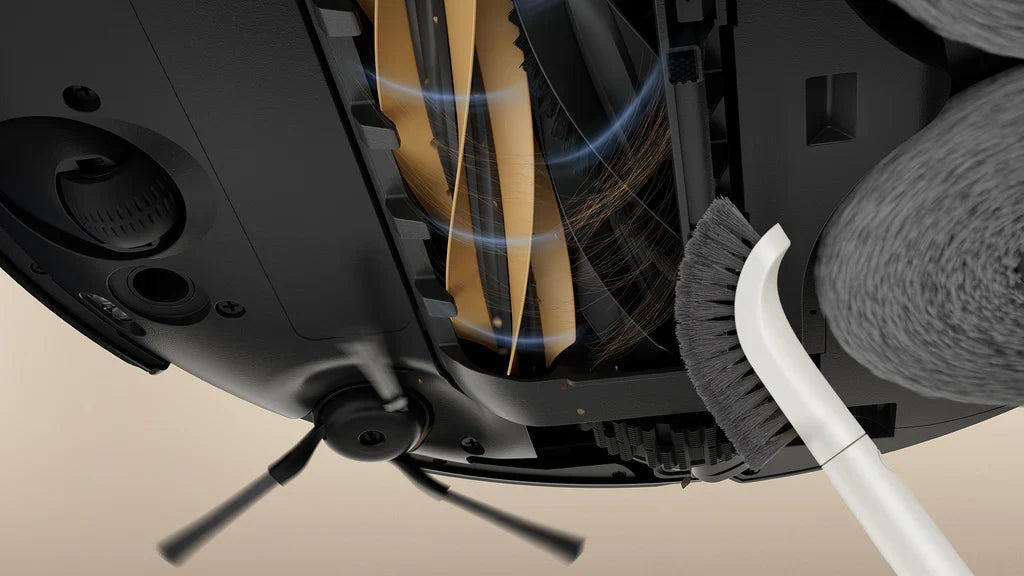
2. Cleaning the Brushes
The main roller brush and side brushes do the heavy lifting. Over time, they accumulate hair, thread, and fibrous debris that wraps tightly around the bristles and axles. Left unchecked, this causes the motor to strain, reduces cleaning effectiveness, and can even damage the brush housing.
Remove the Main Roller Brush
Flip your robot vacuum over and locate the main brush. Most models have a simple clip or latch that lets you slide the brush out. Remove it carefully.
Cut Away Tangled Hair
Use scissors or a seam ripper to carefully cut through tangled hair and thread wrapped around the brush. Work your way along the full length, being careful not to cut the bristles themselves. Many brands include a small cleaning tool with the vacuum for exactly this purpose.
Clean the Brush Housing
While the brush is out, check the channel it sits in for trapped debris. Use a dry cloth or a small brush to clean out any dust or hair lodged in the housing.
Check Side Brushes
Remove the side brushes (usually a simple pull or twist) and clean any wrapped hair from the spindle. Bent or frayed side brushes should be replaced — they're inexpensive and make a noticeable difference to edge-cleaning performance.
Anti-Tangle Brushes
Newer models like the Dreame L40s Pro feature dual rubber roller brushes specifically designed to resist hair tangling. If you have long-haired pets (or family members!), this is a feature worth looking for when buying your next robot vacuum.

3. Cleaning and Replacing the Filter
The filter catches fine dust, allergens, and particles that the dustbin can't hold. A clogged filter is one of the most common causes of reduced suction — and it's the easiest thing to fix.
Remove the Filter
Open the dustbin compartment and carefully remove the filter. Most robot vacuums use a HEPA or high-efficiency filter located either inside or behind the dustbin.
Tap or Rinse
Gently tap the filter against a hard surface (over a bin) to dislodge trapped dust. If your filter is washable (check your manual), rinse it under lukewarm running water. Do not use soap or cleaning products — water only. Allow the filter to air-dry completely for at least 24 hours before reinserting.
Replace When Worn
Even washable filters degrade over time. Replace your filter every 6–12 months for optimal performance. If you notice your vacuum isn't picking up as well as it used to despite being cleaned, a fresh filter is often the answer.
Never Reinstall a Damp Filter
Putting a wet filter back into your vacuum can cause mould growth inside the unit and damage the motor. Always allow at least 24 hours of air-drying time. If you need the vacuum before then, keep a spare filter on hand.
4. Cleaning the Sensors
Your robot vacuum uses an array of sensors to navigate your home, detect obstacles, avoid drops (like stairs), and map rooms. Dirty sensors are a surprisingly common cause of erratic behaviour — random bumping, missed areas, getting stuck, or even falling down stairs.
Locate All Sensors
Most robot vacuums have sensors on the underside (cliff/drop sensors), the front bumper (collision sensors), and the top (LiDAR dome or camera). Check your manual for the exact locations on your model.
Wipe with a Dry Microfibre Cloth
Gently wipe each sensor window with a clean, dry microfibre cloth. Do not use water, cleaning sprays, or compressed air directly on the sensors — moisture can leave residue that interferes with the infrared or laser signals.
Don't Forget the LiDAR Dome
If your vacuum uses LiDAR navigation (the raised dome on top), keep it dust-free. Even a light film of dust can affect mapping accuracy. A gentle wipe once a week is all it takes.
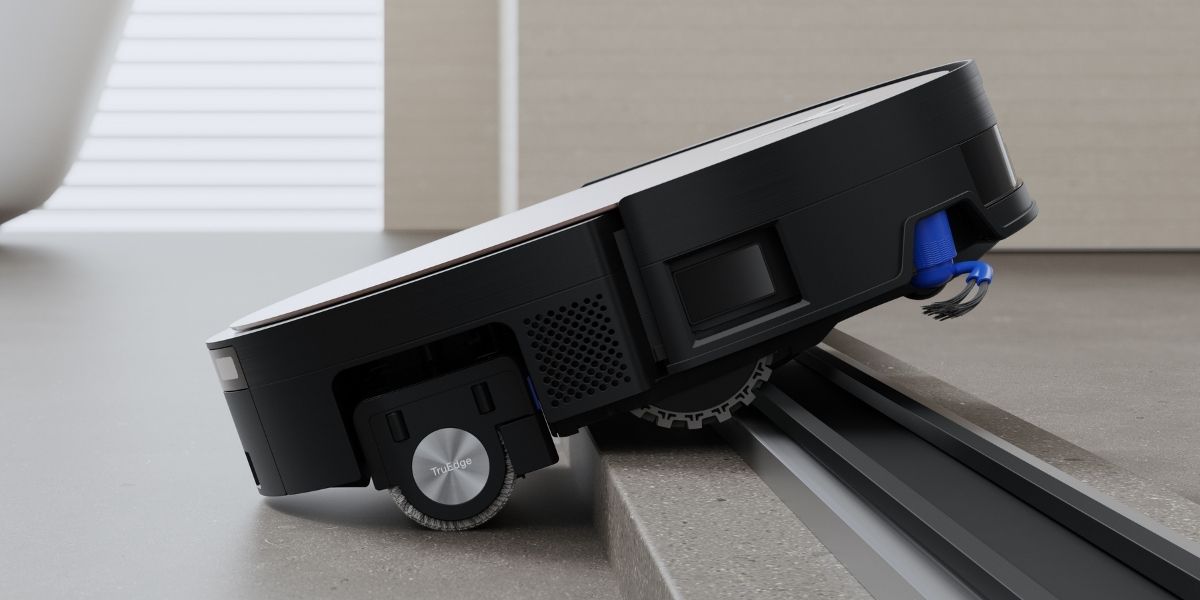
5. Checking the Wheels
The wheels are easy to overlook, but hair and debris can wrap around the wheel axles and restrict movement. This puts extra strain on the drive motors and can cause your vacuum to struggle on carpet transitions or get stuck more frequently.
- Main drive wheels — Gently pull each wheel outwards to check for give and spring-back. Remove any tangled hair from around the axle with tweezers or scissors.
- Front castor wheel — Pop out the front castor (most pull straight out) and clear any hair or debris wrapped around the spindle. This wheel takes more wear than you'd think.
- Tread check — Look at the rubber treads on the drive wheels. If they're worn smooth, the vacuum will struggle with grip — especially on carpets and rugs. Replacement wheels are available for most models.
6. Maintaining the Mop (Hybrid Models)
If you have a robot vacuum with a mopping function (like the Dreame L40 Ultra, Eufy X10 Pro Omni, or Dreame L40s Pro), the mop pads need regular attention to stay hygienic and effective.
Self-Cleaning Docks
Premium models with self-cleaning base stations wash and dry the mop pads automatically. Even so, it's worth removing the pads periodically for a manual wash — especially if you notice any lingering odour or discolouration.
Manual Mop Pads
If your model requires manual mop maintenance, rinse the mop pads after each use under warm water. For a deeper clean, hand-wash with a small amount of mild detergent every week. Avoid fabric softener — it reduces the pad's absorbency.
Replace Regularly
Mop pads wear out over time, losing their microfibre texture and cleaning effectiveness. Replace them every 3–6 months, or sooner if they look flat and discoloured.
Water Tank Hygiene
Don't leave water sitting in the mopping tank for days at a time — it can become stale and breed bacteria. Empty the tank after use if you won't be running the vacuum again within 24 hours. For dock-based systems, check and replace the clean water supply regularly.
7. Cleaning the Charging Contacts
If your robot vacuum isn't charging properly, dirty contacts are usually the culprit. Both the metal contacts on the underside of the vacuum and on the charging dock can accumulate dust and oxidation over time.
- Vacuum contacts — Wipe the metal charging strips on the underside of the vacuum with a dry cloth. If they look tarnished, a very light rub with a pencil eraser can restore conductivity.
- Dock contacts — Wipe the metal plates on the charging dock with a dry cloth. Make sure the area around the dock is kept clear of dust and debris.
- Dock placement — Ensure the charging dock is on a flat, hard surface with at least 0.5m clearance on each side and 1.5m in front for the vacuum to approach and dock correctly.
8. Battery Care
Most robot vacuums use lithium-ion batteries that typically last 2–5 years or 400–500 charge cycles. Proper care can push your battery towards the higher end of that range.
Battery Best Practices
Avoid full depletion — Don't regularly let the battery drain to 0%. Most modern robots return to dock automatically before this happens, but if you're manually running the vacuum, dock it before it dies.
Don't store flat — If you're not using the vacuum for an extended period (e.g., holidays), charge it to around 50–70% and store it in a cool, dry place. Don't leave it on the dock at 100% for months on end.
Avoid extreme temperatures — Lithium-ion batteries degrade faster in very hot or very cold conditions. Keep your vacuum and dock in a room-temperature environment.
9. Software Updates
This one is often forgotten, but it matters. Robot vacuum manufacturers regularly release firmware updates that improve navigation, fix bugs, and sometimes add entirely new features. Keep your vacuum's companion app updated and accept firmware updates when they're available.
Most modern robots from brands like Dreame and Eufy push updates automatically through their apps — you'll get a notification when one is available. It's worth checking every month or so if you haven't received a prompt in a while.
10. When to Replace Parts
Even with the best maintenance, consumable parts wear out. Here's a practical guide to replacement intervals:
HEPA Filter
Replace when cleaning no longer restores suction, or the filter is visibly discoloured and damaged.
Every 3–6 monthsMain Roller Brush
Replace when bristles are flattened, frayed, or no longer spinning freely after cleaning.
Every 6–12 monthsSide Brushes
Replace when bristles are bent, splayed outwards, or noticeably shorter than when new.
Every 3–6 monthsMop Pads
Replace when the microfibre feels flat, stiff, or no longer cleans effectively after washing.
Every 3–6 monthsDust Bags (Dock)
Replace when full — most docks alert you via the app. Don't overfill as it reduces suction.
Every 30–75 daysBattery
Replace when run time drops significantly below the original spec, or the vacuum struggles to complete a full clean.
Every 2–5 years
Stock Up on Spares
It's worth keeping a spare set of filters, side brushes, and mop pads on hand so you're never caught without them. Euronics stocks robot vacuum accessories for popular brands including Dreame and Eufy.

Quick-Reference Troubleshooting Table
| Problem | Likely Cause | Fix | Difficulty |
|---|---|---|---|
| Reduced suction | Clogged filter or full dustbin | Clean or replace filter; empty bin | Easy Fix |
| Vacuum keeps getting stuck | Dirty cliff/drop sensors | Wipe all sensors with dry microfibre cloth | Easy Fix |
| Won't charge / intermittent charging | Dirty charging contacts | Clean contacts on vacuum and dock; check dock placement | Easy Fix |
| Brush not spinning | Hair/debris jammed around roller | Remove brush, cut tangled hair, clear housing | Easy Fix |
| Missing spots or poor mapping | Dirty LiDAR dome or camera | Wipe the navigation sensor dome/camera with dry cloth | Easy Fix |
| Loud or unusual noise | Debris in main brush or wheels | Inspect and clean brush, wheels, and castor | Moderate |
| Mopping leaves streaks | Worn mop pads or stale water | Replace mop pads; use fresh water in tank | Easy Fix |
| Battery drains quickly | Ageing battery or extreme temperatures | Check battery health in app; replace if degraded | Moderate |
| Error codes / won't start | Firmware issue or mechanical fault | Update firmware via app; restart vacuum; contact support if persistent | Needs Service |
| Falls down stairs | Dirty or blocked cliff sensors | Clean cliff sensors on the underside immediately | Easy Fix |
Preparing Your Home for Better Cleaning
A little room preparation goes a long way towards both better cleaning results and fewer maintenance headaches:
- Pick up loose cables and small objects — charging cables, socks, and small toys are the most common things that jam a robot vacuum's brushes.
- Tuck away curtains and low-hanging fabric — long curtains and bed skirts can get sucked into the vacuum or tangled around the wheels.
- Use virtual boundaries or no-go zones — most modern robots let you set these via the companion app. Use them to keep your vacuum away from pet bowls, delicate furniture legs, or areas with lots of cables.
- Close doors to rooms you don't need cleaned — this saves battery life and means less debris in the bin per session.
- Lift dining chairs onto the table — this lets your robot clean under the table more effectively and reduces the chance of getting stuck between chair legs.
Robot Vacuums Available at Euronics
Looking for a new robot vacuum or need to upgrade? Here are some of the top-rated models available from your local Euronics Specialist store:

Dreame X50 Ultra
Flagship robot vacuum with 12,000Pa suction, extendable side brush, and all-in-one self-cleaning base station with hot water mop washing.
View at Euronics →
Eufy X10 Pro Omni
Premium all-in-one robot vacuum and mop with self-emptying, self-refilling, and self-cleaning dock. Powerful 8,000Pa suction.
View at Euronics →
ECOVACS DEEBOT X9 Pro Omni
Intelligent robot vacuum and mop with AIVI 3D obstacle avoidance, TrueMapping 3.0 LiDAR navigation, and all-in-one OMNI station.
View at Euronics →
Samsung Bespoke Jet Bot Combo AI
Samsung's 3-in-1 cleaning robot with AI-powered FlexiSpin mopping, Active Steam+ for stubborn stains, and smart home integration.
View at Euronics →
Dreame D20 Pro Plus
Affordable robot vacuum with strong suction, LiDAR navigation, and self-emptying base station — great value for larger homes.
View at Euronics →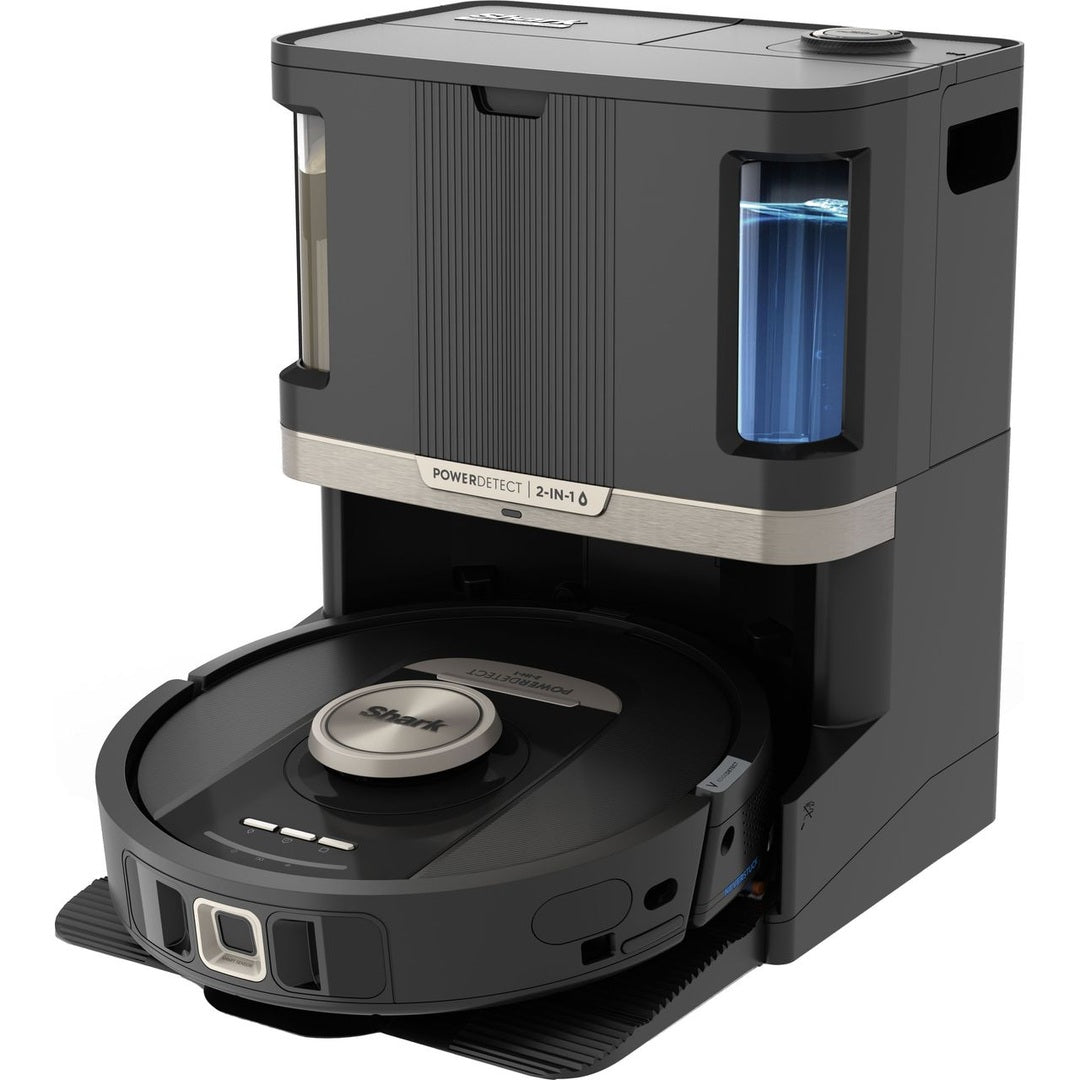
Shark 2-in-1 Self-Empty Robot Vacuum & Mop
Self-emptying, self-refilling, and self-cleaning robot vacuum and mop from Shark. Great all-round performer with app control.
View at Euronics →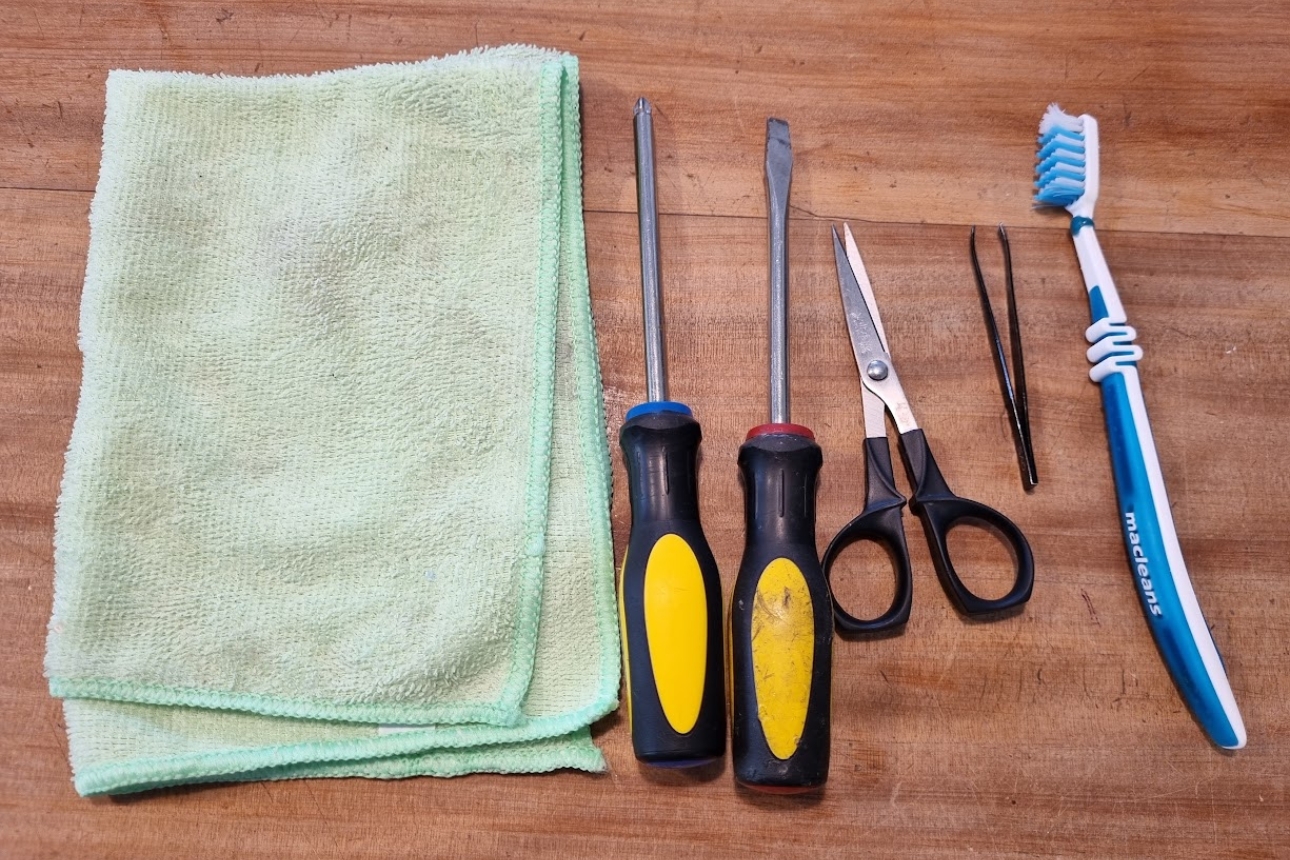

Browse Robot Vacuums & Accessories at Euronics
Whether you're looking for your first robot vacuum or need replacement parts for your current one, your local Euronics Specialist store has you covered.
Shop Robot Vacuums Shop Accessories Find Your Local StoreSources: ECOVACS, Dreame, Consumer NZ. This guide has been compiled by the Euronics Specialists for informational purposes. Always refer to your manufacturer's manual for model-specific care instructions. Product availability may vary by store.